How it works
How it works
From install to a working Assets structure in a few minutes. No wizards, no configuration files, no lengthy setup. This page walks through the deployment flow and explains what happens technically at each stage.
The three-step deployment flow
Step 1: choose a template
Open JSM LaunchPad from within your Jira Cloud site. The template gallery presents all available service models organised by category: Foundation, Operational, IT Infrastructure, Specialised, and Governance.
Each template card shows the schema name and description, the number of object types and attributes, and its complexity level (Starter, Operational, Advanced, or Enterprise). Click on any template to open a detailed preview showing every object type, its attributes, and how types relate to one another.
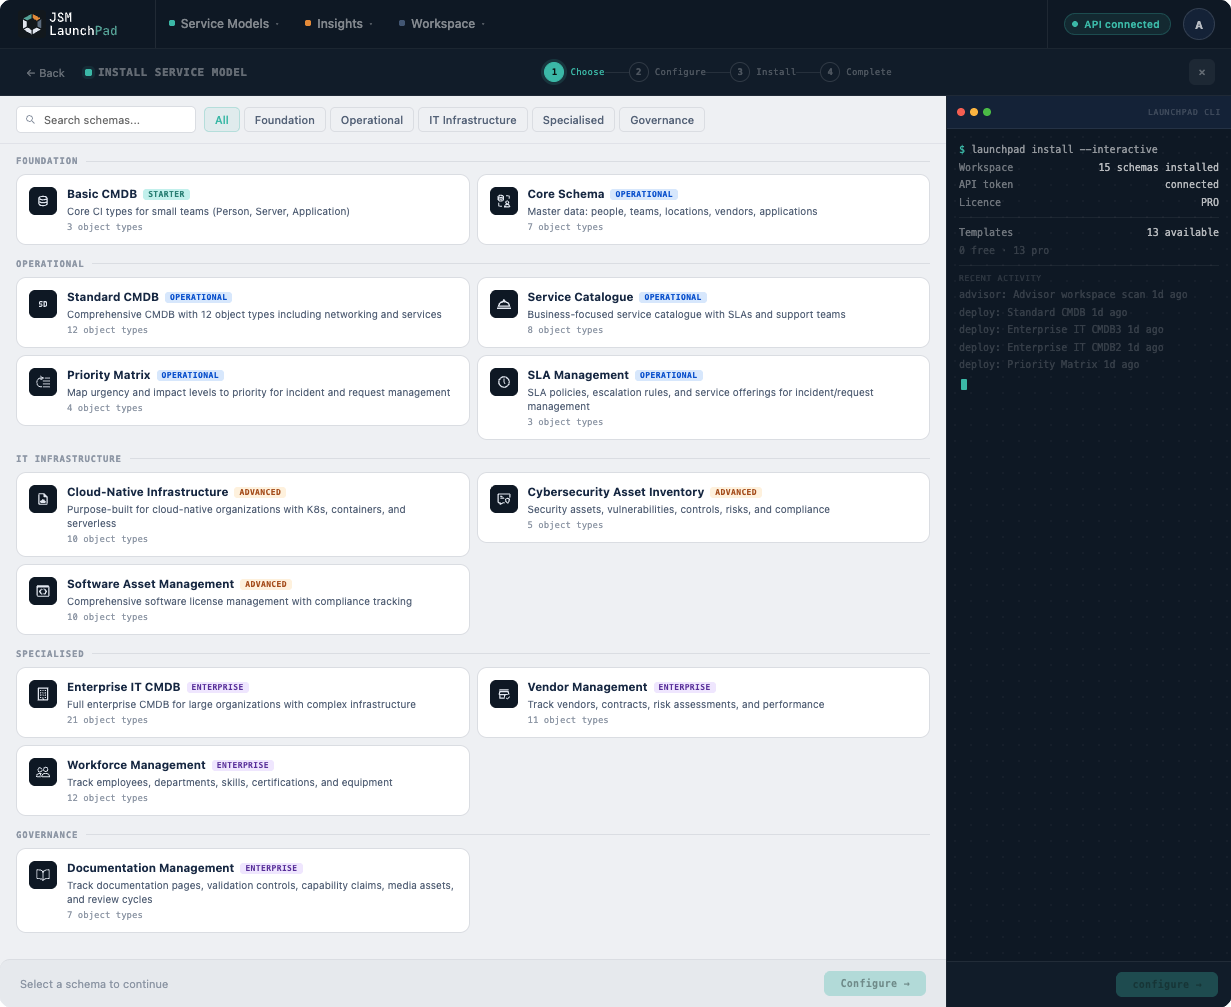
Step 2: configure
Once you have chosen a template, you provide a name for the new schema. That is the only configuration required. The template defines everything else.
Step 3: deploy
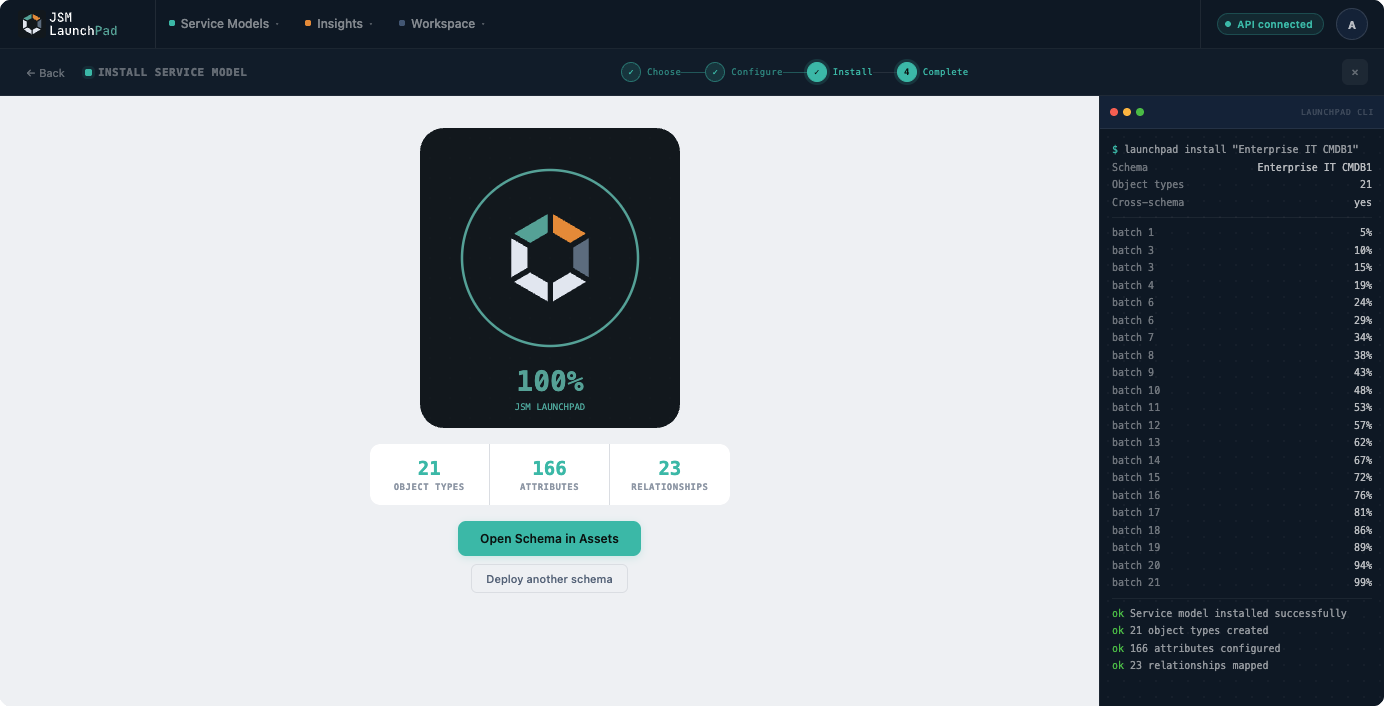
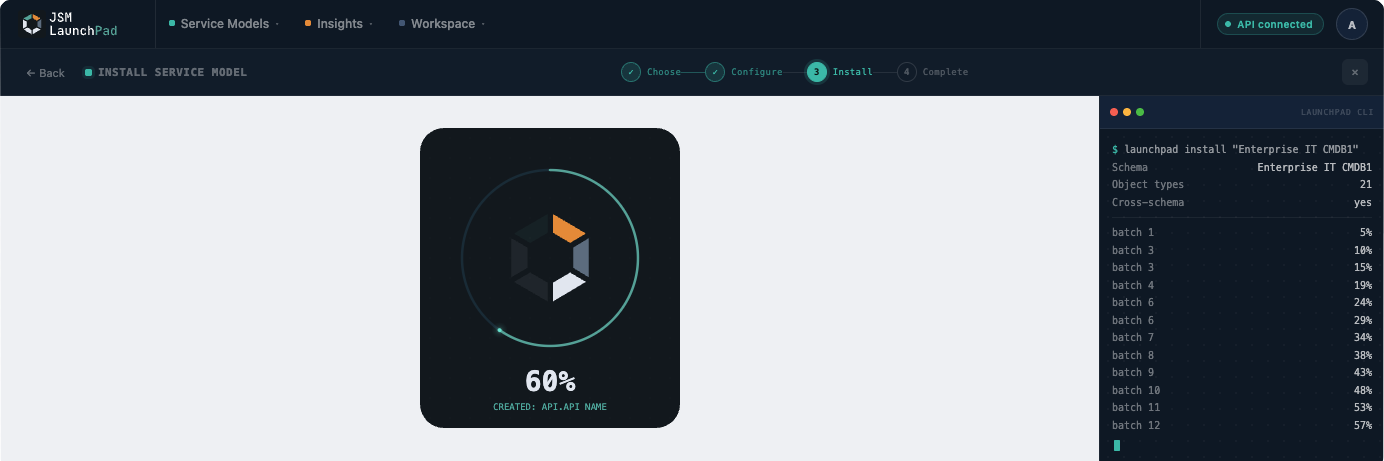
Click deploy. JSM LaunchPad creates the complete schema in your Assets workspace. You can watch the progress in real time. Once deployment completes, the app shows a success confirmation with a direct link to your new schema.

What happens technically
When you click deploy, JSM LaunchPad performs a precise sequence of API operations against the Assets REST API. If you are curious about the internals, here is the breakdown.
1. Schema creation
The app creates a new object schema in your workspace. This is an empty container that does not affect any existing schemas.
2. Object type creation
Each object type is created within the new schema. The app respects parent-child hierarchy, ensuring child types are created after parents.
3. Attribute creation
For every object type, each attribute is created with the correct configuration:
| Attribute Type | Handling |
|---|---|
| Text, integer, float, boolean, date, email, URL | Created with their specified types |
| Select | Created with pre-defined option values |
| Object reference | Created last, after all object types exist |
4. Reference type resolution
The app checks which reference types already exist in your workspace and reuses them rather than creating duplicates. If a template requires a custom reference type that does not already exist, the app can create it when API credentials are configured in Settings (this is needed because Forge OAuth scopes do not currently support custom reference type creation). Without API credentials, the app uses default workspace reference types, which works for most deployments.
5. Icon assignment
Each object type is assigned an appropriate icon, matched by name against the Assets built-in icon library.
Batched processing for large schemas
Atlassian Forge functions have a 25-second execution timeout. JSM LaunchPad handles this automatically through batched processing:
| Mechanism | Detail |
|---|---|
| Batch size | Up to 10 operations per invocation |
| State persistence | State persisted between batches |
| Frontend polling | Triggers next batch until complete |
| Progress indicator | Shows deployment progress in real time |
From your perspective, you click deploy and watch the progress bar. The batching is entirely transparent.
Safety guarantees
Every deployment follows strict safety rules:
| Guarantee | Detail |
|---|---|
| Additive only | Only creates new schemas, object types, and attributes. Never modifies or deletes existing data. |
| Isolated schemas | Each deployment creates a self-contained schema. |
| Idempotent naming | Alerts you if a schema with your chosen name already exists. |
| No third-party servers | Runs entirely on Atlassian Forge. No data is sent outside the Atlassian platform. |
Safe to try on production. LaunchPad never touches your existing schemas or data. If you deploy something and change your mind, just delete the new schema from Assets. Everything else stays exactly as it was.
After deployment
Once your schema is deployed, it is fully yours. JSM LaunchPad does not lock you in. Your options:
-
Add data manually; open any object type and start creating records
-
Import via CSV; use Assets' built-in CSV import to bulk-load data
-
Connect discovery tools; point asset discovery tools at your new schema
-
Customise; add additional attributes or extend the structure to fit your needs