Install a service model
Install a service model
Installing a service model takes a few minutes. This guide walks you through it step by step.
Before you start
You will need access to Jira Service Management and permission to create object schemas in Assets. If you are not sure whether you have schema creation permissions, go to Assets → Schemas (from the Jira sidebar). If you can see a "Create schema" option, you are good. If not, speak to your Jira admin before proceeding.
Pro tip: Keep the browser window open throughout installation. If you navigate away, the process may continue in the background but you will lose visibility of progress and need to check Assets manually to confirm completion.
The installation steps
Step 1: Open LaunchPad
Go to Apps → JSM LaunchPad in your Jira navigation. This opens the LaunchPad home screen where your available models are listed.
Step 2: Choose your model
You will see the full catalogue of available schemas. Select the one that matches your environment. If you have already worked through Which schema should I choose?, you will know which one you are going for. If you are still unsure, Standard CMDB is the right starting point for most teams.
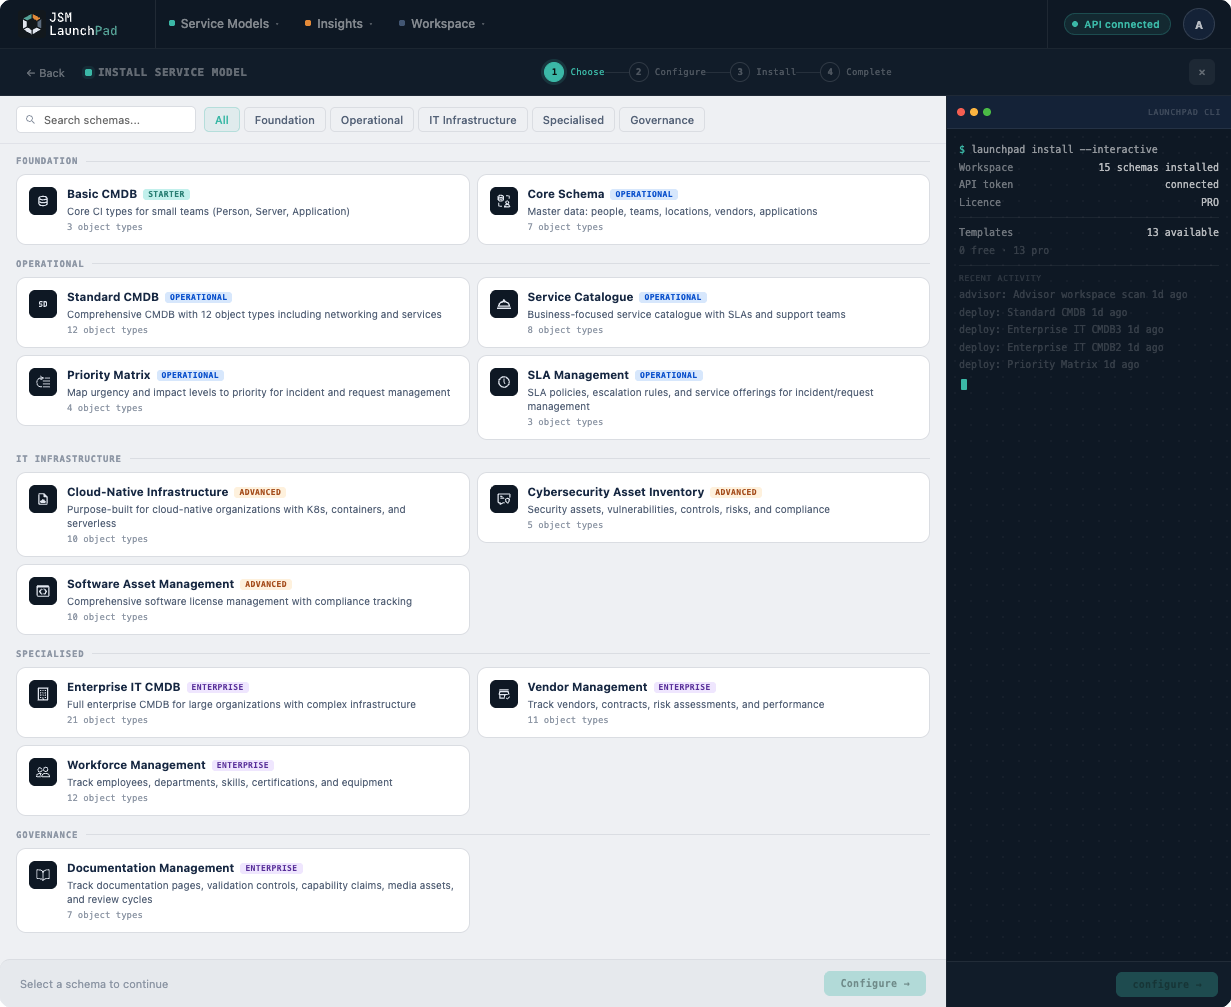
Step 3: Review before you commit
Before you install, take a moment to look at what the model includes: the object types, the relationship structure, the overall shape of what is about to be created. It is worth thirty seconds to confirm you are installing what you expect.
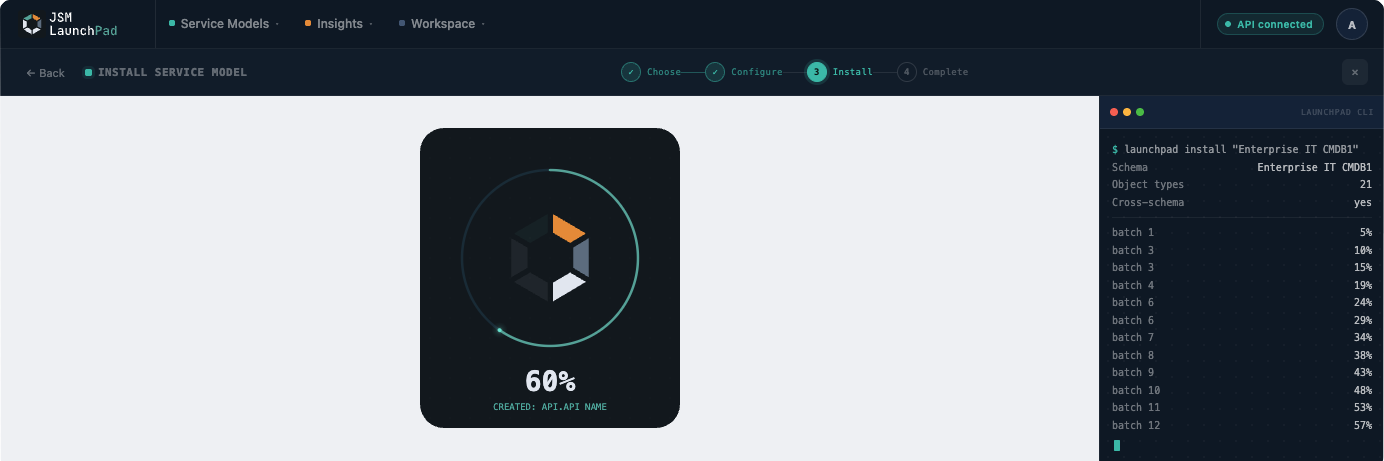
Step 4: Install
Click Install Service Model and confirm when prompted. LaunchPad will begin building your schema immediately. You will see a progress indicator as object types and relationships are created. Larger models take a little longer. The Enterprise IT CMDB, for example, has significantly more to provision than Basic CMDB.

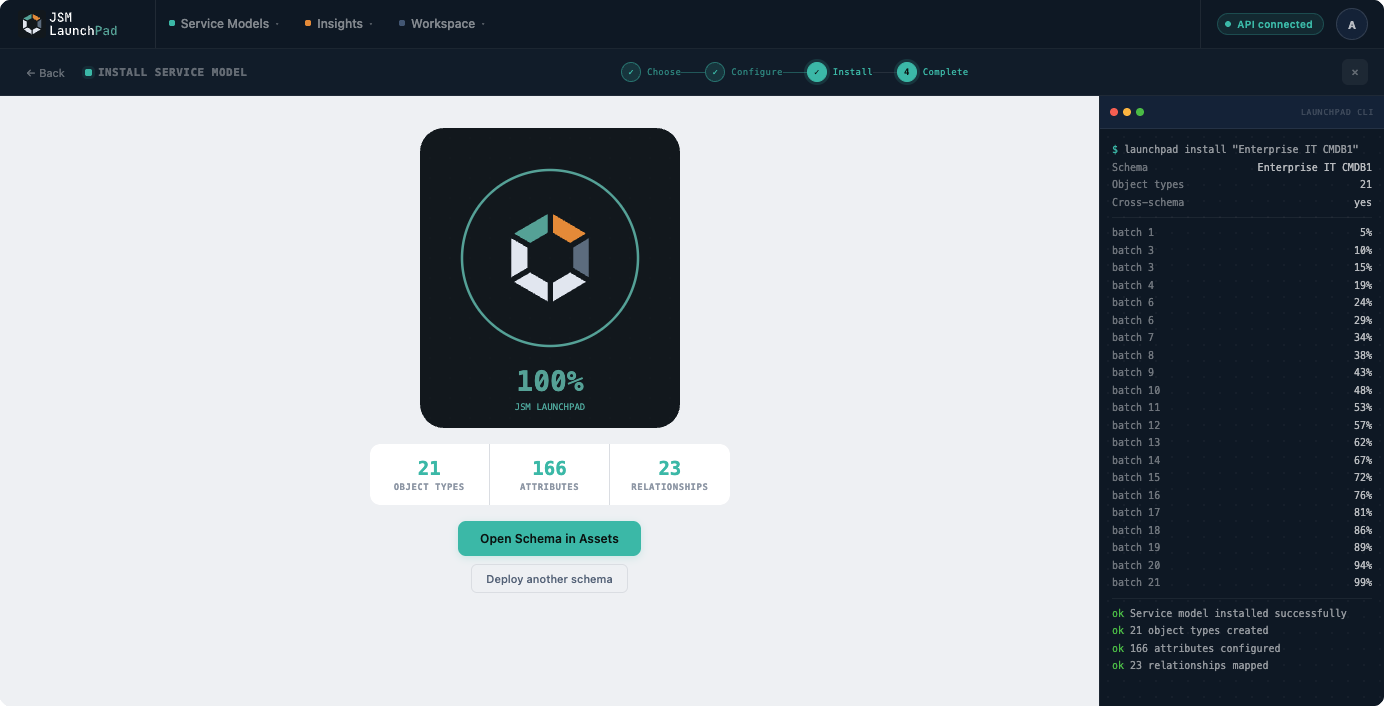
Step 5: Confirm it is done
When installation completes, you will see a confirmation message. Go to Assets → Schemas (from the Jira sidebar) and confirm your new schema is listed. Open it and check that the object types are there.
What LaunchPad creates (and what it does not touch)
Everything LaunchPad creates goes into the new schema. Nothing else in your Jira environment is modified. Your existing schemas, data, workflows, and configurations are untouched.
If installation fails for any reason, check Assets → Schemas (from the Jira sidebar) for any partially created schema. If one is present, delete it manually before re-running. See the installation safety and rollback page for details.
If something looks wrong
| What you are seeing | What is likely happening | What to do |
|---|---|---|
| Installation fails immediately | Missing schema creation permissions | Check with your Jira admin |
| Progress stalls for several minutes | Large model or temporary API delay | Wait, do not refresh or close |
| Schema not visible after completion | Navigation has not refreshed | Reload the Assets page |
If none of those resolve it, raise a support request and include the model name and any error messages you saw.